How to take a professional selfie

What do Rembrandt, President Obama, Andy Warhol and Madonna have in common?
Of course, each of these people is—or was—world famous. But after fame and fortune, the similarities fade.
The answer is that at some point in their lives, all these people made selfies. Whether they used oil on canvas, acrylic on silkscreen or a cell phone camera, each sidestepped the middleman by creating self-portraits. Impromptu snapshots of unique meetings or perfectly positioned pieces of art, the resulting images are fascinating. Why? Because selfies show people through their own eyes—not through those of a professional portrait artist or photographer.
So what does this mean for today’s job seeker?
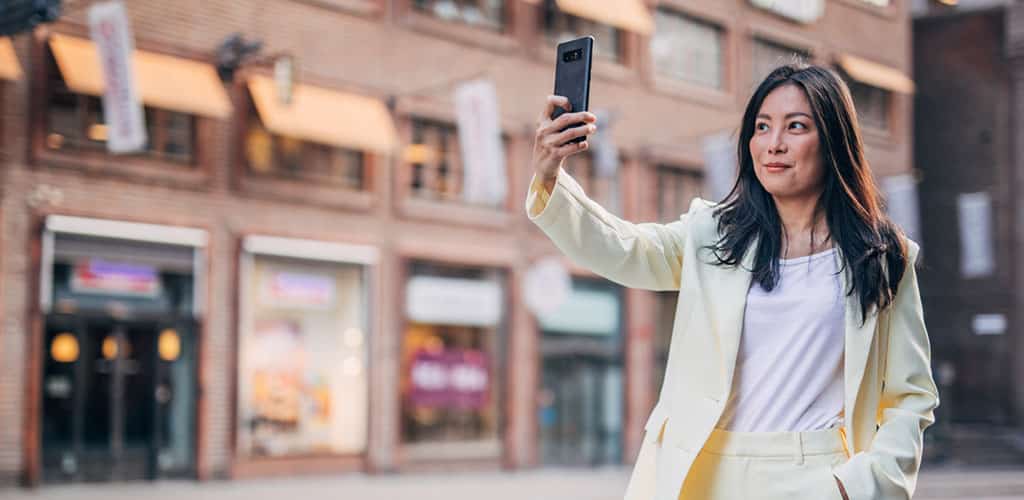
It’s simple: adding a selfie to your professional profile can wrestle your profile pic out of the headlock of a stuffy, self-conscious studio shot and into the unlimited possibilities of your own personal art direction. Since you’re in charge of the entire process, shyness shouldn’t be an obstacle. Additionally, you can do as many takes as you need to get it right without it costing you a dime. Curious? Read on to find out more.
Take your best professional selfie
Job search tips invariably emphasize how important presentation is. Treat your selfie with the same respect as you do your résumé and business card. Every aspect of the photograph should correspond with the image you want to project in your work. To ensure this, consider the following six points.
1. Examples. Review some headshots of professionals you admire and look for elements you’d like to use in your selfie. For example, if you like action shots that show professionals at work, then use that theme. Or if you prefer pictures of people sitting at their desks, use a similar style.
Tip: Don’t stray too far from the norm. Unless you’re a creative professional, you want to stand out because of your professional achievements, not because your selfie is an amazing work of art.
2. Setting/background. Brainstorm settings that support your polished and professional profile. For example, if you work in government, use a government building as a backdrop. If you’re a PR specialist, take a photo of yourself at a conference. If you’re a techie, make sure your computer’s in the shot. It’s also advisable to make sure nobody else is in the photo, especially if you intend to use the selfie on your social media accounts. If the image does include others, don’t simply crop them out, since the results could look messy and unprofessional. Instead, invest some more time and re-do your photo shoot in a place where you won’t be disturbed.
Tip: It’s impossible to control your environment if you choose a public setting. So don’t just snap a pic and upload it directly to your profile. Instead, carefully review it on a large screen to ensure there aren’t any unexpected surprises.
3. Color palette. Colors play an important role in the balance of an image. Lots of bright colors can be overwhelming, while predominantly subdued tones can be boring. Make sure to stand out in a good way by choosing contrasting colors. For example, in an urban setting with predominantly gray tints, select bright tones of blue, red or green. In an outdoor setting like a park, avoid greens, browns and blues and instead, choose reds, pinks or yellows.
Tip: Think twice before you wear something with a pattern. Dots, stripes and prints can distract the eye away from the focal point of the image: your face.
4. Attire. With the above tips on colors in mind, select clothes that are appropriate for your professional setting.
Tip: Remember that most selfies involve holding your camera at arm’s length while taking the picture. This physical position can alter the way your clothes fit to your body. For example, a shirt and tie might get scrunched up around the neck or a V-neck sweater can become too revealing. Do a test run in your chosen outfit to make sure your clothes won’t spoil the shot.
5. Lighting. Professional photographer Rodnesha Green advises using natural light, preferably in the morning or evening. You want to avoid hard illumination such as bright sunlight, indoor lighting or built-in flashes. The softer the light, the more flattering it is for your features.
Tip: Schedule your selfie shoot for the next cloudy day. Clouds naturally diffuse sunlight and offer a much softer effect.
6. Angles. The angle of your head relative to the lens can make or break a selfie. Taking a picture straight on will result in unflattering distortion, while looking down into the lens can give you the appearance of having a double chin. For the best angle, hold your device at arm’s length, then move it up approximately 45 degrees. This aligns your body and reduces distortion.
Tip: No duck faces, please! Looking into the camera with a nice smile is the best message you can send to connect with the viewer.
Unless you’re a seasoned model and photographer, don’t expect to get it right the first time round. But keep practicing and before you know it, you too can rock your selfie and land the job of your dreams!
Sources:
- http://www.metmuseum.org/toah/works-of-art/14.40.618;
- http://www.washingtonpost.com/blogs/the-fix/wp/2014/04/16/barack-obama-and-joe-biden-took-a-selfie-today-yes-for-real/;
- http://www.mhpbooks.com/salman-rushdies-selfies/;
- http://blog.oxforddictionaries.com/press-releases/oxford-dictionaries-word-of-the-year-2013/;
- http://www.levo.com/articles/skills/how-to-take-a-professional-headshot;
- http://byregina.com/tips-for-professional-selfies/;
View Related: Article Job searching
You might like
Do substitute teachers get health benefits?
3 minute read
What a substitute teacher does.
4 minute read
Do substitute teachers get health benefits?
3 minute read
What a substitute teacher does.
4 minute read
Find your next job
Discover thousands of temporary, full-time, and remote jobs for beginning and experienced job seekers.


